
First of all, we must talk about what is vitepress. VitePress is a modern static site generator based on the Vite front-end build tool. It is designed to be fast and efficient, making it a great choice for building small to medium-sized websites and blogs. With its easy-to-use interface and compatibility with a wide range of technologies, including Vue.js, JavaScript, and CSS, VitePress is a versatile option for front-end development.
Here’s how to get started with VitePress:
Installation
- Install Node.js and yarn or npm if you haven’t already.
- Create a new folder project.
mkdir vitepress-project && cd vitepress-project
- Initialize our project with your preferred package manager.
yarn init
- Now, install some packages including vitePress. (These last 4 will help create our collection of JSON pages).
yarn add vitepress vue nodemon gray-matter remove-markdown concurrently
- Set up our scripts in package.json.
NOTE: Every time we run our development environment, the data collection mentioned below will be updated.
{
  ...
  "scripts": {
    "dev": "concurrently \"nodemon --watch blog -e md collection.mjs\" && vitepress dev",
    "build": "node collection.mjs && vitepress build",
    "preview": "vitepress preview"
  },
  ...
}
- Create our first views.
echo '# Hello from Index' > index.md
mkdir blog && echo '# Hello from First Article' > blog/first_article.md
- It is also possible to configure our project, for SEO, and themes, among others. Here is an example:
// .vitepress/config.js
const META_TITLE = 'Blog VitePress';

export default {
  lang: 'es',
  title: META_TITLE,
  description: 'A new website',
  themeConfig: {
    siteTitle: false,
    socialLinks: [
      { icon: 'github', link: '' },
    ]
  },
  head: [
    ['link', { rel: 'icon', type: 'image/x-icon', href: '/vite.ico' }],
    ['link', { rel: 'icon', type: 'image/png', href: '/vite.png' }],
  ],
}
Convert our markdown pages to a JSON collection
Why is it important? 🤔🤔
The answer is simple, the collections help us to create previews of our articles without the need to create double information. (It’s like we have an API)
This is possible thanks to nodemon, gray-matter, remove-markdown, simultaneously. Which work together to process and convert a markdown file to a JSON file.
- Configure our collection data articles.
// collection.mjs
import fs from 'node:fs/promises';
import matter from 'gray-matter';
import removeMd from 'remove-markdown';

const articles = await fs.readdir('./blog/');

const data = await Promise.all(
  articles.map(async (article) => {
    const file = matter.read(`./blog/${article}`, {
      excerpt: true,
      excerpt_separator: ''
    });

    const { data, content, path } = file;
    const contents = removeMd(content).trim().split(/\r\n|\n|\r/);

    return {
      ...data,
      title: contents[0].replace(/\s{2,}/g, '').trim(),
      path: path.replace(/\.md$/, '.html'),
      description: contents.slice(1).join('').replace(/\s{2,}/g, '').trim().substring(0, 300) + '...'
    }
  })
)

await fs.writeFile('./data.json', JSON.stringify(data), 'utf-8');
- Now, build a new JSON file. (This command will generate one more file for our project, where it simplifies the markdown items to JSON).
yarn build && yarn dev
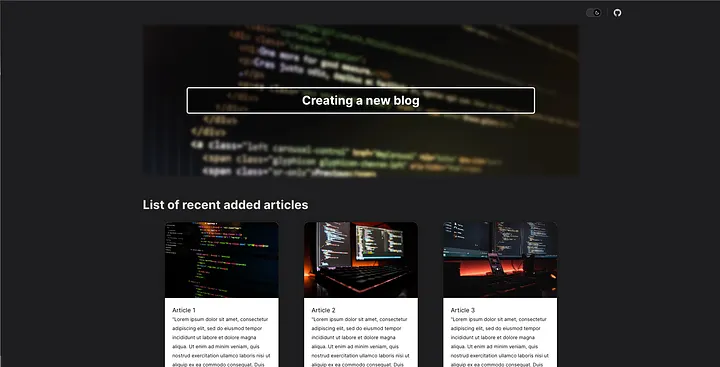
Creating new Vue components
- Create a Hero component.
<!-- .vitepress/components/Hero.vue -->
<script setup>
import DefaultTheme from 'vitepress/theme'

const { Layout } = DefaultTheme;

</script>

<template #home-hero-before>
  <div class="container">
    <div class="banner">
      <div class="banner-hero"></div>
      <div class="banner-hero-text">
        <h1>Creating a new blog</h1>
      </div>
    </div>
  </div>
</template>
- Now it’s time to create a component to list our articles that have been created in the blog folder.
<!-- .vitepress/components/ListArticles.vue -->
<script setup>
import data from '../../data.json';
import DefaultTheme from 'vitepress/theme';
import Card from './Card.vue';

const { Layout } = DefaultTheme;

// sort articles
const articles = data.sort(
  (a, b) => new Date(b.Updated) - new Date(a.Updated)
)

</script>

<template>
  <Layout>
    <template #home-hero-after>
      <div class="container">
        <h2 class="title">List of recent added articles</h2><br>
        <div class="article-container">
          <div v-for="article in articles">
            <Card :article="article" />
          </div>
        </div>
      </div>
    </template>
  </Layout>
</template>
- We can also create a single card component for each article preview.
<!-- .vitepress/components/Card.vue -->
<script setup>
  defineProps({
    article: Object
  });

  const transformDate = (date) => {
    return new Date(date).toLocaleDateString('en-US', {
      year: 'numeric',
      month: 'long',
      day: 'numeric'
    })
  }

</script>

<template>
  <a :href="article.path">
    <div class="card">
      <div class="card-header">
        <img :src="article.image" :alt="article.title" />
      </div>
      <div class="card-body">
        <h4>
          {{ article.title }}
        </h4>
        <p>
          {{ article.description }}
        </p>
        <div>
          <h5 class="date">{{ transformDate(article.Updated) }}</h5>
        </div>
      </div>
    </div>
  </a>
</template>
- Create a theme entry file. It should export the theme as its default export. Also, check the Layout slots offered by Vitepress.
//.vitepress/theme/index.js
import { h } from 'vue'
import DefaultTheme from 'vitepress/theme';
import Hero from '../components/Hero.vue';
import ListArticles from '../components/ListArticles.vue';
import '../main.css'

export default {
  ...DefaultTheme,
  Layout() {
    return h(DefaultTheme.Layout, null, {
      'home-hero-before': () => h(Hero),
      'home-hero-after': () => h(ListArticles),
      'doc-after': () => h('div', {}, [
        h(
          'div',
          {
            class: 'link',
          },
          [
            h(
              'a',
              {
                href: '/',
                rel: 'noopener',
              },
              [h('span', '< Back')]
            ),
          ]
        )
      ]),
    })
  }
}
Finally
Now, you can create a blog using vitePress in a very simple way. I share the repo Github so you can review the source code.
Thank you for reading! we read soon. 🙌🏽🙌🏽